

- Click-on precision trimmer attachment
- Shaving unit with hair chamber
- Notification symbol
- Cleaning reminder
- Replacement reminder
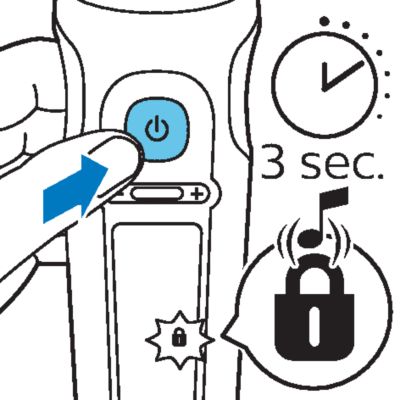
- Travel lock symbol
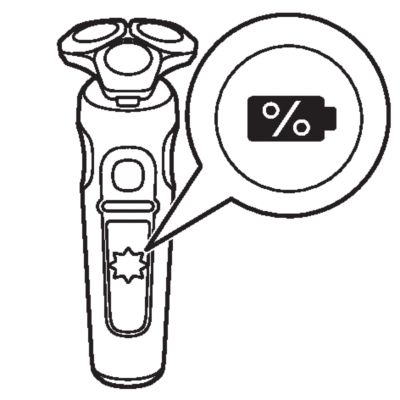
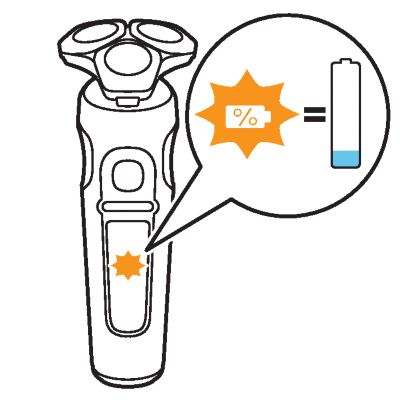
- Battery charge indicator
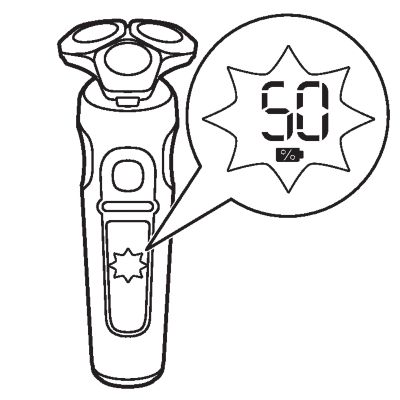
- Battery charge percentage
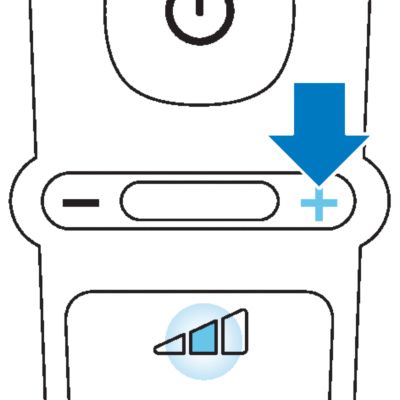
- Personal comfort settings bar
- Personal comfort settings increase button
- Personal comfort settings decrease button
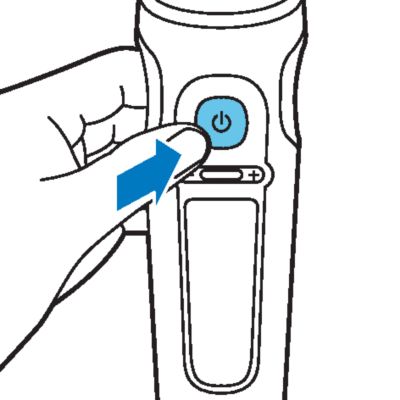
- On/off button
- Quick Clean Pod Cartridge
- Quick Clean Pod
- Small plug
- Power cord with plug
- Pouch


- Make sure the shaver is switched off.
-
-
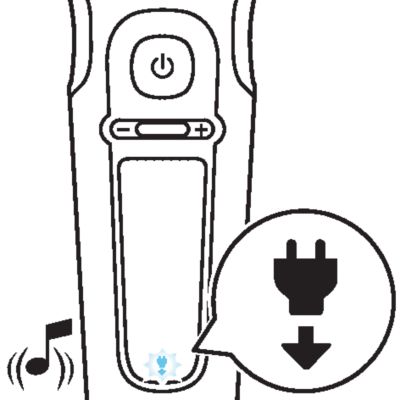
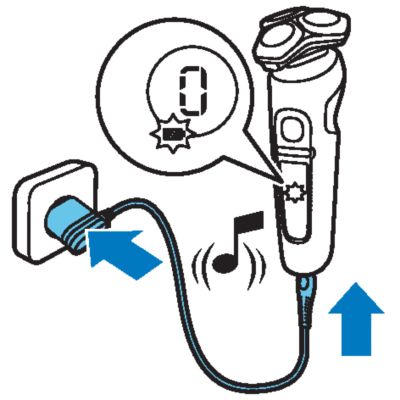
Put the small plug in the shaver and put the supply unit in the wall socket. The display of the shaver indicates that the shaver is charging.
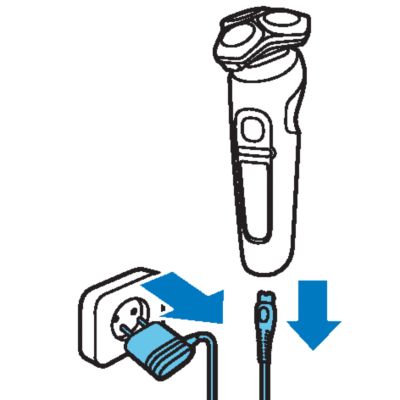
- After charging, remove the supply unit from the wall socket and pull the small plug out of the shaver.
- Note: When the battery is full, the display switches off automatically after 15 minutes.\n

- Use this shaver for its intended household use as described in this manual.
- For hygienic reasons, the shaver should only be used by one person.
- Trimming is easier when the skin and hair are dry.
-
To switch on the shaver, press the on/off button once. The battery charge percentage lights up for a few seconds.
-
To switch off the shaver, press the on/off button once. The battery charge percentage lights up for a few seconds and shows the remaining battery charge.
- For the best results on skin comfort, pre-trim your beard if you have not shaved for 3 days or longer.
- Select your personal comfort setting.
- Switch on the shaver.
-
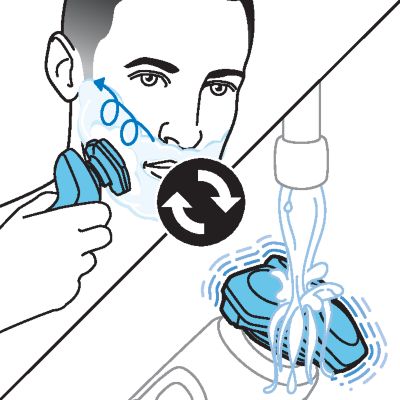
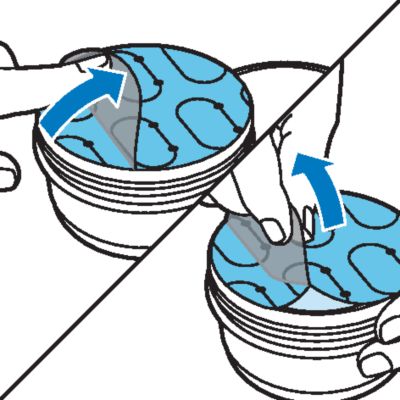
- Move the shaving heads over your skin in circular movements to catch all hairs growing in different directions. Make sure each shaving head is fully in contact with the skin. Exert gentle pressure for a close, comfortable shave.
- Note: Do not press too hard, as this can cause skin irritation.
-
Switch off and clean the shaver after each use. The display lights up for a few seconds to show the remaining battery charge.
- Apply some water to your skin.
-
- Apply shaving foam or shaving gel to your skin.
-
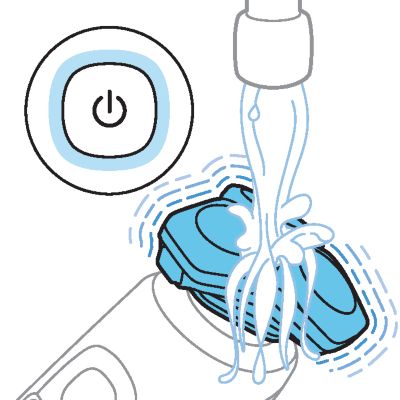
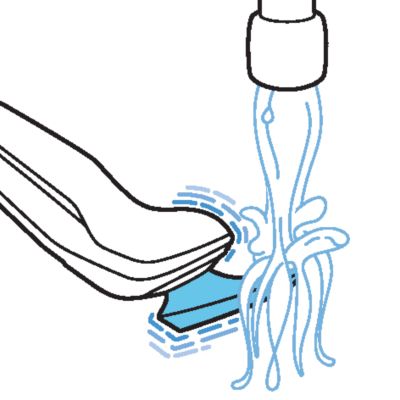
- Rinse the shaving unit under the tap to ensure that the shaving unit glides smoothly over your skin.
- Switch on the shaver.
-
- Move the shaving heads over your skin in circular movements to catch all hairs growing in different directions. Make sure each shaving head is fully in contact with the skin. Exert gentle pressure for a close, comfortable shave.
- Note: Do not press too hard, as this can cause skin irritation.
- Note: Rinse the shaving unit regularly to ensure that it continues to glide smoothly over your skin.
- Dry your face.
- Switch off the shaver and clean it after each use.

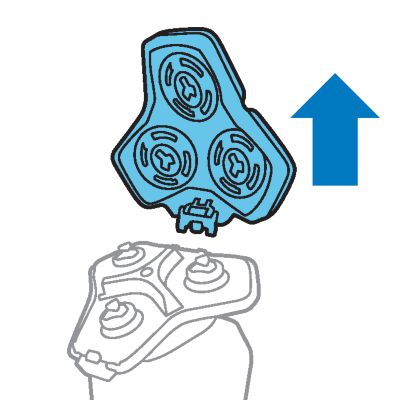
- Make sure the shaver is switched off.
-
- Pull the attachment straight off the shaver.
- Note: Do not twist the attachment while you pull it off the shaver.
-
- Insert the lug of the attachment into the slot in the top of the shaver. Then press down the attachment to attach it to the shaver (‘click’).
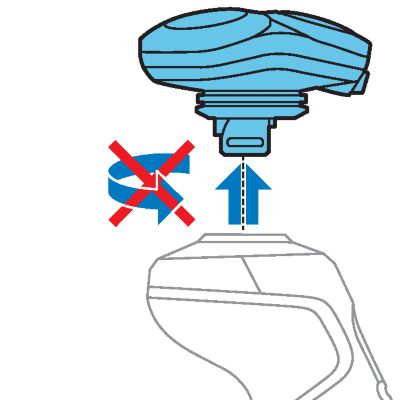
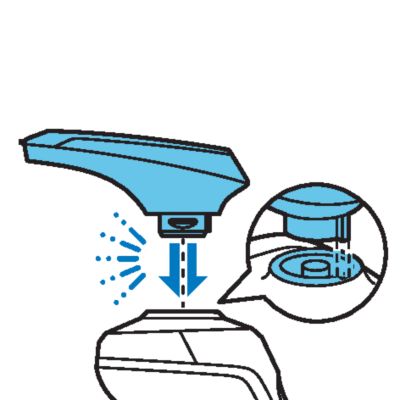
- Attach the attachment to the appliance (‘click’).
- Switch on the shaver.
-
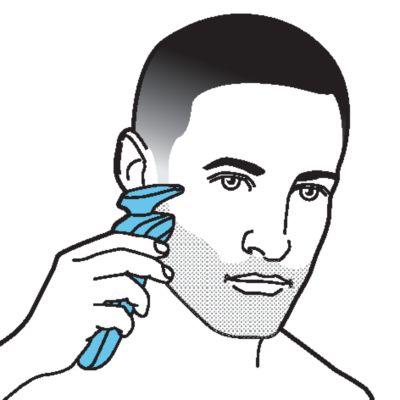
- Hold the precision trimmer perpendicular to the skin and move it downwards while exerting gentle pressure.
- Switch off the shaver and clean the attachment after use.
- Press the on/off button for 3 seconds to use the travel lock mode.
-
- Press the on/off button for 3 seconds.
-
While you deactivate the travel lock, the travel lock symbol lights up briefly and the shaver produces a short sound.The shaver switches on and is now ready for use again.
| Icon | Behavior | Meaning |
 | Becomes visible on the Quick Clean Pod | The Quick Clean Pod Cartridge needs to be replaced. |
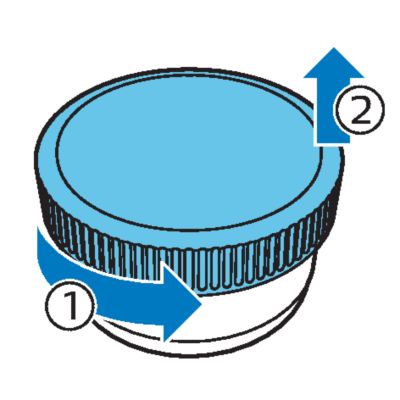
- Twist and remove the top of the Quick Clean Pod.
-
- Twist the lid off of the Quick Clean Pod Cartridge.
-
- Lift the tab on the seal and pull it by the corner to remove the seal from the Quick Clean Pod Cartridge.
-
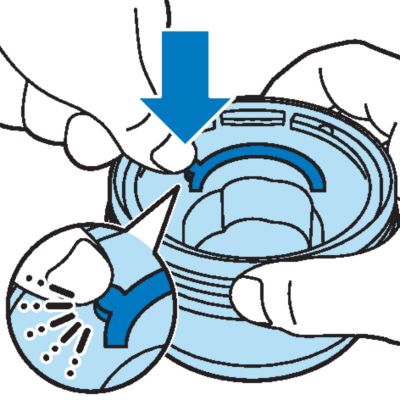
- Press the small circular piece on the handle of the Quick Clean Pod Cartridge to break the snap hook on the handle.
-
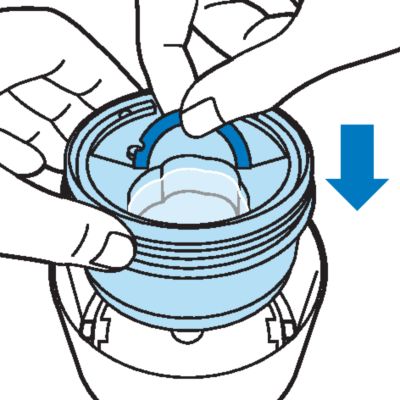
- Place the Quick Clean Pod Cartridge into the Quick Clean Pod.
-
- Put the top of the Quick Clean Pod back onto the base and turn it clockwise until you hear a click.
-
- Do not tilt the Quick Clean Pod to prevent leakage.


- Place the shaver upside down into the Quick Clean Pod. The shaver automatically detects that it is in the Quick Clean Pod.
- Switch on the shaver to start the cleaning program.
- Let the shaver air-dry completely in the Quick Clean Pod before storing it.
| Frequency of use | Cycles | When to replace the Quick Clean Pod Cartridge |
| Every day | About 30 | Every month |
| A few times per week | About 20 | Every 2 months |
| Every week | About 13 | Every 3 months |
| Every month | About 3 | Every 3 months |
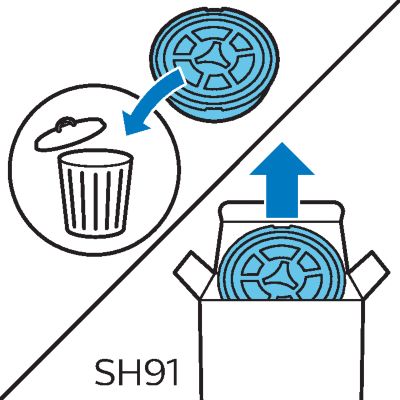
- Twist and remove the top of the Quick Clean Pod.
-
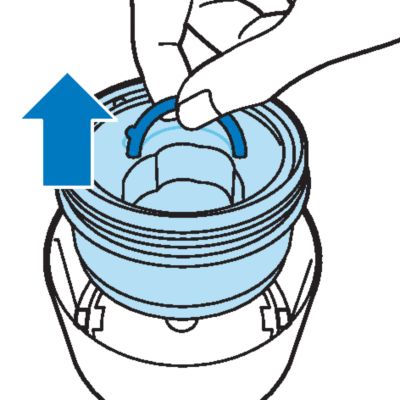
- Lift the Quick Clean Pod Cartridge out of the Quick Clean Pod by the handle.
-
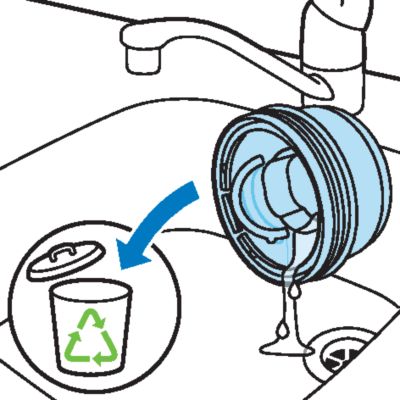
- Pour any remaining fluid down a drain and recycle the empty cartridge in accordance with local waste regulations.
-
-
Place a new Quick Clean Pod Cartridge into the Quick Clean Pod. Scan the QR code to the left or visit www.philips.com/cleaning-cartridge to order replacement Quick Clean Pod Cartridges.

- Switch off the shaver.
-
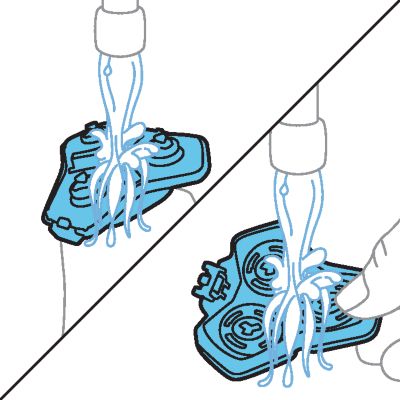
- Pull the shaving head holder off the bottom part of the shaving unit.
-
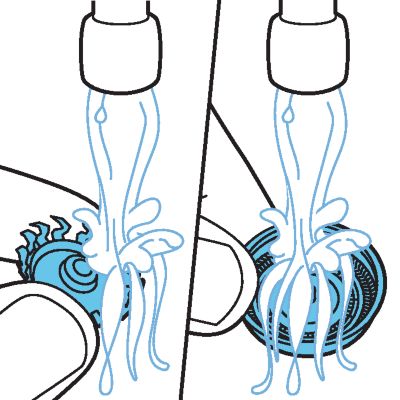
- Rinse the hair chamber and shaving head holder under the tap.
-
-
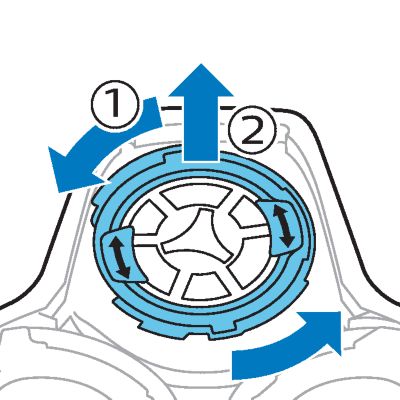
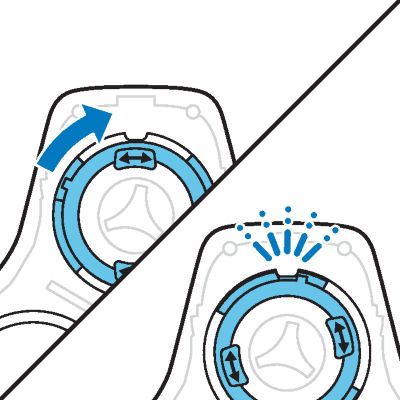
Turn the retaining ring anticlockwise and lift it off the shaving head. Repeat this process for the other retaining rings. Place them aside in a safe place.
-
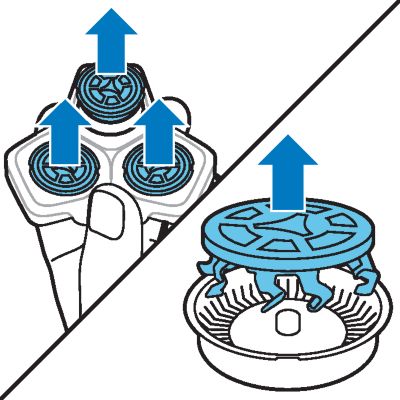
- Remove the shaving heads from the shaving head holder. Each shaving head consists of a cutter and guard.
- Note: Do not clean more than one cutter and guard at a time, since they are all matching sets. If you accidentally put a cutter in the wrong shaving guard, it may take several weeks before optimal shaving performance is restored.
-
- Clean the cutter and guard under the tap.
- Shake off excess water.
- Put the cutter back into the guard.
-
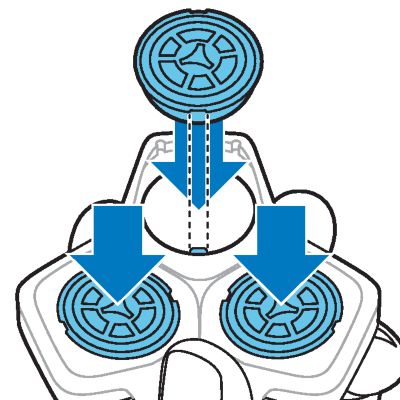
- Place the shaving heads in the shaving head holder.
- Place the retaining ring on the shaving head.
-
- Align the arrows on the retaining ring with the projections in the shaving head holder. Turn the ring clockwise until it clicks to indicate that the ring is fixed.
-
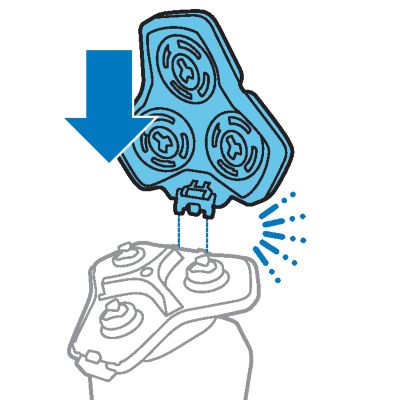
- Attach the shaving head holder to the bottom part of the shaving unit (‘click’).
- Switch on the shaver with the precision trimmer attachment attached.
-
- Rinse the attachment under a warm tap.
- After cleaning, switch off the shaver.
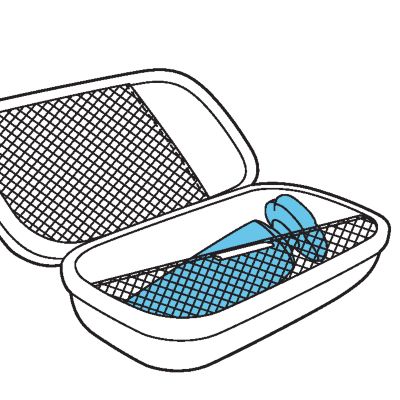
- Carefully shake off excess water and let the attachment air-dry completely.
- Tip: For optimal performance, lubricate the teeth of the attachment with a drop of sewing machine oil regularly.

- Switch off the shaver.
-
- Press the release button on the shaving unit and pull the shaving head holder off the shaving unit.
-
- Remove the shaving heads from the shaving head holder. Discard the used shaving heads immediately to avoid mixing them with the new shaving heads.
-
-
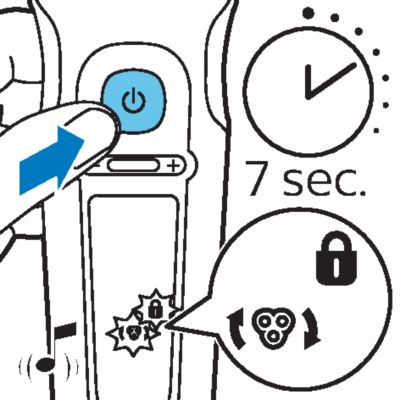
After replacing the shaving heads, you can reset the replacement reminder by pressing the on/off button for 7 seconds. Wait until your hear 3 beeps.
If you do not reset the replacement reminder, the shaver resets automatically after 9 shaves.
- SH91 Philips Norelco replacement shaving heads
- CC12 Philips Norelco Quick Clean Pod Cartridge 2-pack
- This product contains a rechargeable lithium-ion battery which must be disposed of properly.
- Contact your local town or city officials for battery disposal information. You can also call 1-800-822-8837 or visit www.call2recycle.org for battery drop-off locations.
- For assistance, visit our website www.philips.com/support or call 1-800-243-3050 toll free.
- Your product is designed and manufactured with high quality materials and components, which can be recycled and reused. For recycling information, please contact your local waste management facilities or visit www.recycle.philips.com.

")
")
")
")
")